
How to Get an Epic Cinematic Look in Premiere Pro with Portraiture and Realgrain
Creating a cinematic look is not only about color. Skin, light, texture, and tone all help create the final mood.
In this tutorial, we use two Imagenomic plugins:
Portraiture Video – improves skin and helps balance light on the face.
Realgrain Video – adds film-inspired color, tone, and texture.
Together, they make it easy to turn clean digital footage into a softer, more cinematic image directly in Premiere Pro.
Step 1 – Start with Portraiture
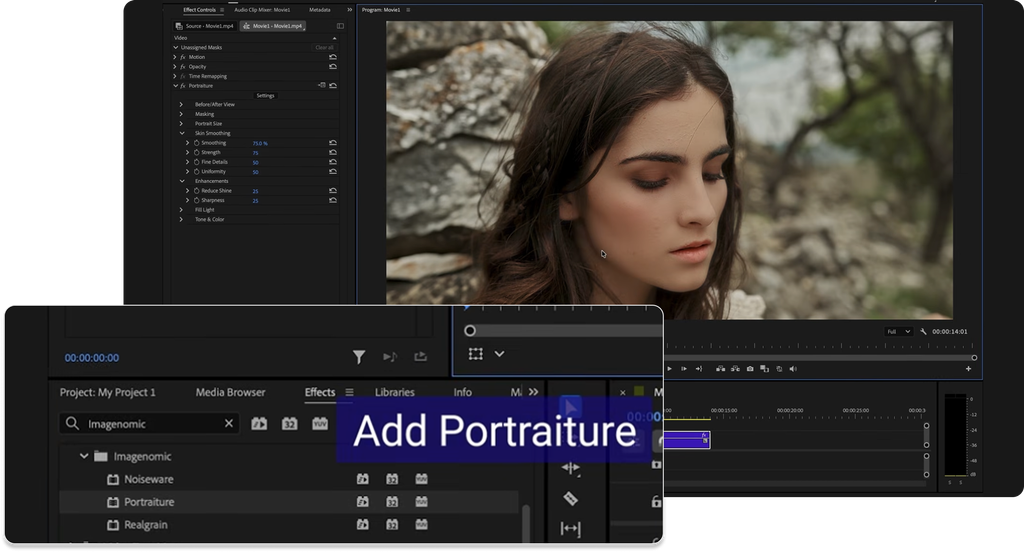
Add Portraiture Video to your clip.
Portraiture automatically detects the face and helps smooth and refine skin while keeping it looking natural.
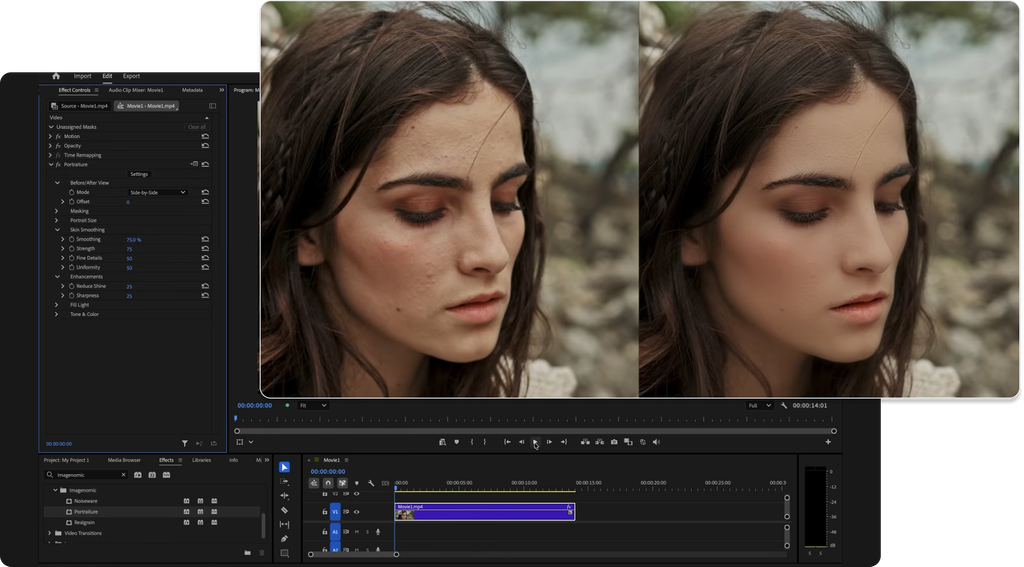
Turn on Side-by-side to compare the original footage with the Portraiture result.
Step 2 – Add the Film Look with Realgrain
Next, add Realgrain Video.
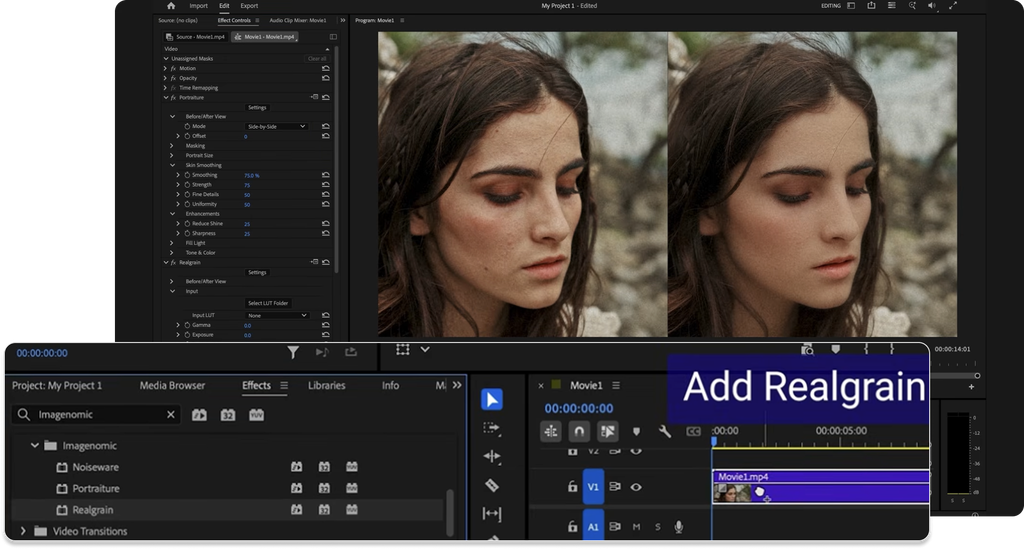
Realgrain changes the overall look of the footage by adding film-inspired color, tone, and texture.
Open Styles and select Winter Storyland.
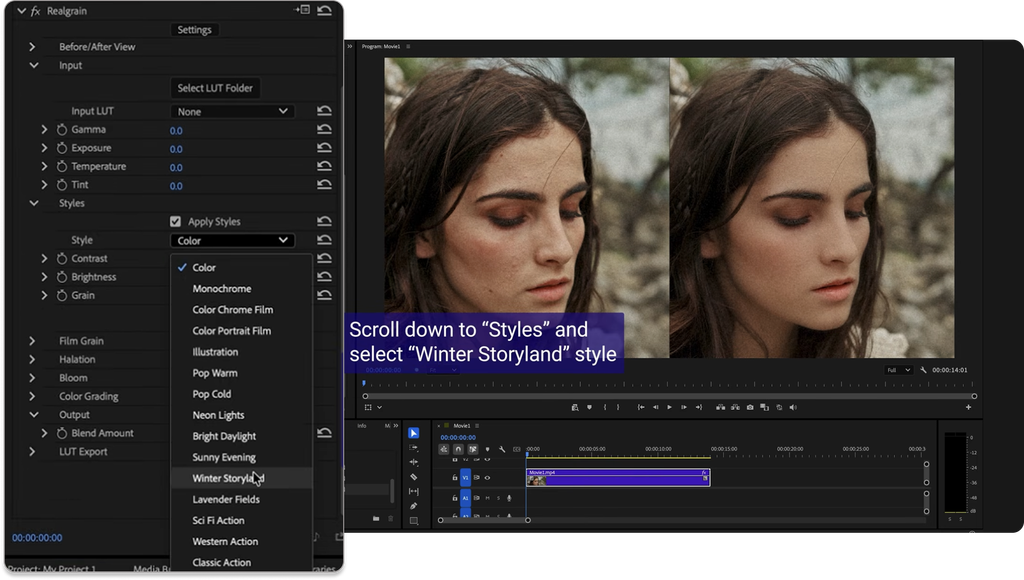
The footage now has a softer, more atmospheric cinematic look.
Step 3 – Add More Light to the Face
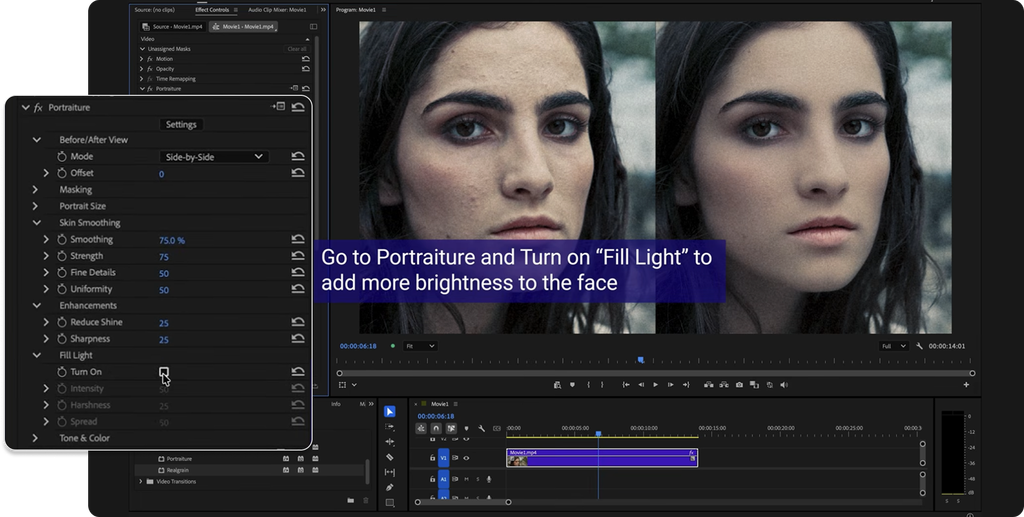
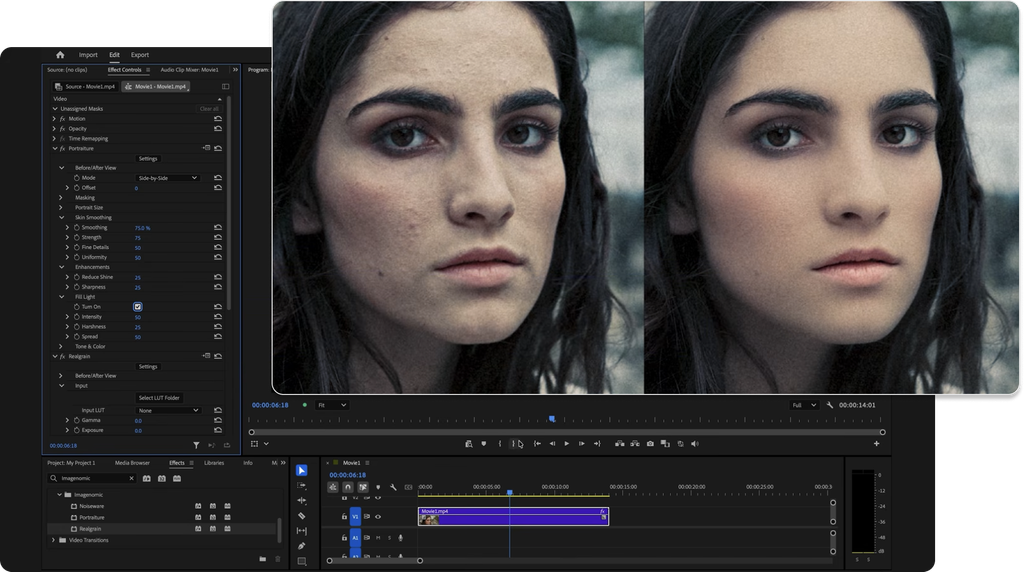
After applying the film look, go back to Portraiture and turn on Fill Light.
Fill Light gently brightens the face without making the whole image brighter.
See the Final Look
Turn off Side-by-side to see the complete result.
Portraiture keeps the skin natural and balanced, while Realgrain gives the whole image its film-inspired character.
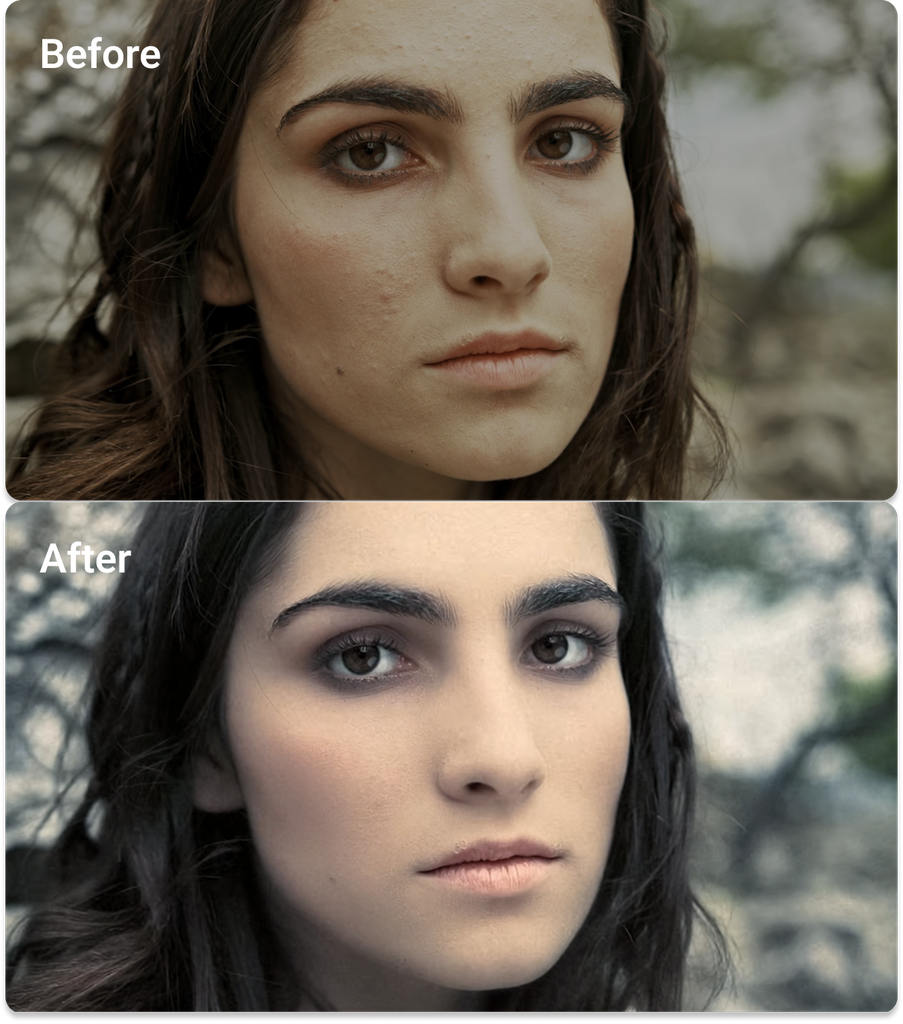
With just a few simple steps, you can create a polished cinematic look directly in Premiere Pro.